Share

Monday 29 November 2021

Tomato Wizardry In a Bottle!


Tongue in Peat
Tongue in Peat

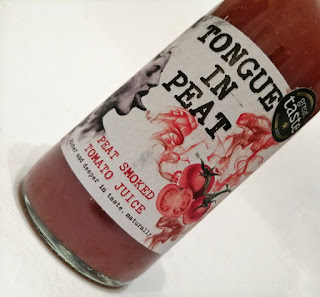
You say tomato I say….what the heck!  Tongue in Peat is one of only a few smoked tomato juices that are made, it however can boldly claim to be the only one that is peat smoked, with peat from the Scottish Island of Islay which they found imparted notes of tangy smoked sea salt!

Tongue in Peat is proudly made in Scotland by less than 12 people, making 5,000 bottles per batch, the tomatoes are hand chopped to ensure maximum surface is exposed to the peat fires!  It definitely sounds like a lot of love goes into the whole process.

Tongue in Peat
Tongue in Peat 

Well, on to the smoked tomato juice itself, I love the label on the bottle, this is what drew me in, it certainly peaked my curiosity and being a lover of tomato juice I was keen to give this a go and the lovely people at Tongue In Peat kindly sent me a bottle to sample.  

Tongue in Peat
Tongue in Peat

What can I say, from the moment you open the bottle you are hit by the smokey earthy aroma -  now on to the taste.  For my Bloody Mary I poured a shot of vodka into a tall glass, topped up with the tomato juice, few glugs of Worcestershire sauce, a good few shakes of Tabasco sauce, few grinds of cracked black pepper and some ice, I then garnished with the obligatory stick of celery to which I also added some jalapeƱo stuffed olives and a slice of crispy bacon, hoping to give an additional hit of saltiness, which it did!  

Tongue in Peat
Tongue in Peat

I have to say both the aroma and the taste gave you a double whammy of earthy smokiness which I loved.  This is definitely a different take on tomato juice and yes it won’t be to everyone’s liking but it was to mine so all good.  A truly artisan product and one I am so glad to have stumbled across, give it a go, I dare you!  If you do, let me know what you think and also how you had yours.

Visit them at www.tongueinpeat.com to obtain further info and place an order.


Wednesday 24 November 2021

Curried Squash Soup


Curried Squash Soup
Curried Squash Soup

  • 1 large squash, peeled and cut into chunks
  • 900ml vegetable stock
  • 1/2 can of coconut milk
  • 1 tbsp Penang curry paste
  • 1/2 small red chilli, deseeded and finely chopped
  • Small handful Thai Basil
  • Couple tablespoons of vegetable oil
  • Salt and pepper

Preheat your oven to 180 degrees.  Line a baking tray with foil and cover with the chopped squash.  Drizzle the vegetable oil over the squash and season with salt and pepper before roasting in the oven for around 20 minutes or until the squash is somewhat charred and has softened, then remove from the oven and set aside.

Chopped squash


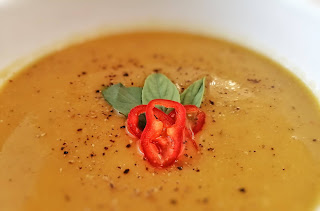
Heat the curry paste in a large pan with some of the chopped chilli, once the aromas and oils are released add the coconut milk and stir until mixed through before adding the squash, stir again to coat the squash then add the vegetable stock and most of the Thai Basil (reserve some along with the chilli to garnish), stir and allow to simmer for around 30 minutes, skimming off any foam at the end of cooking.  Remove from the heat and blitz with a stick blender until you have a smooth consistency.  Serve and garnish with some of the reserved Basil and chilli.

This soup is perfect for this time of year, nice and warming and packed full of flavour.  If you prefer a milder soup then leave out the chilli and add more coconut milk to make it creamier.  I used up 3 small squash left over from Halloween and this made enough for 4 large bowls of soup.  The great thing with this soup is you can use any curry paste that you like or that you have to hand so ideal to use up anything you have in your cupboard.

Mark’s top tip - The skin of the squash is quite tough however a vegetable peeler is ideal to remove the skin!


Saturday 21 August 2021

Sticky Chorizo Burritos


Sticky chorizo burritos

  • 6 medium cooking chorizo
  • 4 teaspoons maple syrup
  • 4 tablespoons bbq sauce
  • 3 large warmed tortillas
  • Tablespoon finely chopped coriander
  • Small tub of guacamole
  • Small tub of sour cream
  • Microwaveable pouch of black beans
  • Large handful of grated cheese

For the rice
  • 60g unsalted butter
  • 2 large garlic cloves,  minced
  • 225g cherry tomatoes (charred)
  • 1/2 teaspoon dried oregano
  • 1 teaspoon sea salt
  • 1 teaspoon medium chilli powder
  • 250g washed basmati rice.

Method:
Start this dish by making the rice.  Melt half of your butter in a large saucepan over a medium heat.  Add the onion, garlic and 2 tablespoons of water and stir well.  Reduce to a low heat and cook for around 10 minutes, until the garlic and onions are softened (not browned).  Put the onion mixture into a blender, add 250ml of water, the cherry tomatoes, oregano, salt and chilli powder and blend until smooth.

Melt the remaining butter in the saucepan over a medium heat, add the rice and stir for around 2 minutes until coated then stir in the chilli-tomato mixture.  Bring to the boil then turn the heat to the lowest setting, cover the pan with a lid and cook for 15-20 minutes until the rice is tender.  Turn off the heat and leave to rest for 5 minutes before fluffing with a fork.

Whilst the rice is cooking, preheat your oven to 180 degrees.  Place the sausages on a roasting tray (line with foil, you will thank me later), brush all over with the maple syrup and roast in the oven for 15 minutes, turning halfway through then coat the sausages in the bbq sauce and return to the oven for a further 10-15 minutes.  Once cooked slice the chorizo into bite sized pieces.

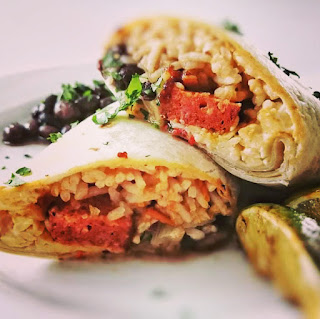
Onto each of your tortillas spoon some rice down the middle, put some of the cooked black beans alongside the rice, top with two of the chopped sausages, sour cream, guacamole and a sprinkle of coriander and some cheese, roll tightly and enjoy.  If you prefer more heat add some hot sauce to your burrito before rolling.  We really enjoyed this dish, next time I will add some home made pineapple salsa to add another flavour dimension.

Mark’s top cheat - If you are pushed for time, buy a pouch of microwaveable Mexican style rice and use instead of making up the rice as above. 


Wednesday 21 July 2021

Sweet and sour chicken


Sweet and sour chicken

  • 4 chicken breasts, cubed
  • Garlic salt
  • 1/2 tsp amchoor (dried mango powder)
  • Cornflour
  • Rapeseed oil
  • 100g sugar
  • 125ml vinegar
  • 4 tbsp ketchup
  • 2 tbsp hot sauce
  • 1 tbsp dark soy sauce
  • 65ml orange juice
  • Salt and freshly ground black pepper

Method
Preheat the oven to 175 degrees.  Line a baking tray with baking paper or foil (trust me, you will be glad you did otherwise washing up becomes a real chore!).  Place your chicken pieces onto a plate and sprinkle with garlic salt (to taste) and the amchoor powder and set aside.  Heat your oil in a large frying pan (about 1” deep), keep at a medium heat whilst you roll your chicken pieces in the cornflour (shake off any excess) and then fry for 4-5 minutes until lightly browned all over, once cooked remove from the pan and leave to one side.

Mix together the sugar, vinegar, hot sauce, ketchup, soy sauce and orange juice, season with a pinch of salt and a few grinds of pepper in a saucepan.  Heat this on a medium heat until the sugar has dissolved.

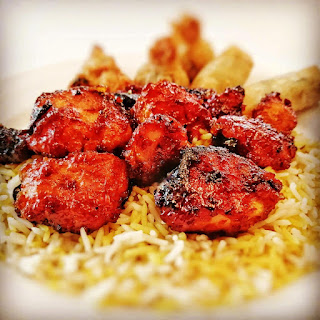
Lay the chicken out on the baking tray and pour over the sauce.  Bake this in the oven for an hour (turning every 20 minutes) until browned and crispy and serve, it’s as simple as that.


I served this with some rice and an assortment of Chinese appetisers which went down really well.  Trust me, once you have made this dish you will never buy store bought or takeaway again, it is so good.  Whilst the sauce contains chilli sauce it isn’t actually that hot, the orange juice evens out any heat.  The amchoor powder is readily available at most  ethnic supermarkets, that said I haven’t tried the recipe without so I can’t say exactly what flavour it brings to this dish so you may be ok without if you can get hold of it.


Mark’s top tip - To change this up and turn it into chilli chicken chop up some fresh chillies and scatter over the chicken after you have poured on the sauce, that will give a real kick to the dish.


Saturday 3 July 2021

Eat them to defeat them Carbonara


Eat them to defeat them carbonara
Eat them to defeat them Carbonara

  • Handful of tender stem broccoli
  • Fusilli pasta 350g (varies on how hungry you are)
  • 200g cubed pancetta
  • Handful of chopped Chorizo
  • 50g grated Parmesan cheese
  • 4 egg yolks
  • Large handful of sweetcorn
  • Large handful of peas
  • Black pepper
  • Salt

Bring a large saucepan of salted water to the boil, add the trimmed broccoli and simmer for 3 minutes, remove the broccoli and set aside to cool down.  Once cooled, chop into small pieces.  Leave the water in the pan as we will use this to cook the pasta in.

Bring your saucepan of water back to the boil and cook your pasta according to packet instructions, add the peas and sweetcorn (frozen is best).  Whilst the pasta is cooking place a large frying pan over a medium heat and add the pancetta and chorizo, they will release their own oils so no need to add oil to the pan.  Lower the heat and continue to fry until crispy.

Once the pasta is cooked, drain (reserve some of the liquid) and then add the pasta to the frying pan, stir well to ensure the pasta soaks up the oils from the pancetta and chorizo.  Remove the pan from the heat, add about 3/4 cup of the reserved water and the egg yolks and stir to create a creamy sauce.  Stir in the broccoli , season with pepper and then sprinkle over the grated Parmesan and serve!

This is a great recipe to include a variety of veggies in and certainly inline with the schools, the kids are definitely eating them to defeat them with this recipe.  If you want to keep to a vegetarian dish omit the meats and add more veggies to the mix, the more the merrier.

The kids both loved this dish and it got two thumbs up from them both, hope you enjoy as much as they did.
Saturday 22 May 2021

Chicken and chorizo tostadas


Chicken and chorizo tostadas

  • Chicken breast cut into bite sized chunks
  • Chorizo sliced and cut into quarters
  • Small flour tortillas
  • Radishes, thinly sliced
  • Diced herbed potatoes (most supermarkets sell these frozen)
  • Fried eggs
  • Avocado
  • Red onion, finely diced
  • 1 tomato, deseeded and cut into small pieces
  • Handful of chopped coriander
  • Hot sauce
  • Salsa verde
  • Lime
  • Rapeseed oil

I haven’t been precise with most of the ingredients as it depends on how many people you are cooking for, I made enough for 6 tostadas so I used half a chorizo ring and two chicken breasts, obviously increase/decrease depending on how many you are feeding.

Firstly we want to make up some pico de gallo to accompany the dish, put the diced onion and tomato into a bowl, the juice of half a lime a splash of hot sauce and half the chopped coriander, stir through and leave to one side.

Cook your potatoes according to packet instructions, usually this takes 20 minutes.  Once they go into the oven, heat the rapeseed oil in a large frying pan (enough to cover the base of the pan and deep enough to cover a tortilla).  Once hot, fry each tortilla until they brown slightly then place in tin foil and leave to one side.  Once the tortillas are done, drain away most of the oil and add the chicken and chorizo and fry until the chicken is cooked through (not much oil is required as the chorizo will release plenty of oil during cooking).  I haven’t added any seasoning to the chicken as you will get plenty of flavour from the chorizo oil however you can add some spices if you wish. 

Once the chicken and chorizo is cooked, remove from the pan and place onto some kitchen roll to soak up any excess oil.  Then crack your eggs into the pan (one for two tostadas) and cook for several minutes until the whites are firm but the yolk remains runny.  Whilst you are cooking the eggs you can assemble your tostadas. 

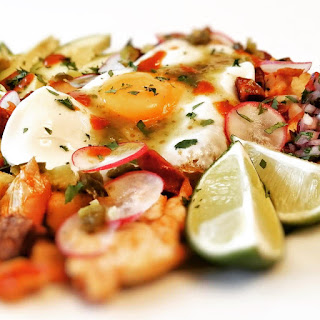
Place two tortillas onto each plate, top with some of the cooked potato and the chicken and chorizo, top with a fried egg and garnish with the sliced radish with some pico de gallo on the side.  Splash over as much hot sauce and salsa verde as you need, sprinkle over some of the remaining chopped coriander and get stuck in!

As you know, I am all for quick and simple recipes and this definitely fits the bill, packed with flavour and super tasty, hope you enjoy as much as we did. 
Sunday 9 May 2021

Pork Vindaloo


Pork Vindaloo
Pork Vindaloo

  • 800g diced pork
  • 3 tbsp rapeseed oil
  • 2 cloves of garlic, thinly sliced
  • 1 tsp brown mustard
  • 10 curry leaves (preferably fresh)
  • 2 brown onions, finely chopped
  • 2 tomatoes, deseeded and finely chopped
  • 1 tsp chilli powder
  • 2 bay leaves
  • Large pinch of salt

For the marinade

  • 1 tsp chilli powder
  • 1 tbsp ground black pepper
  • 1 1/2 tbsp ground cumin
  • 1 1/2 ground coriander
  • 1/2 tsp ground fenugreek
  • 1/2 tsp ground cloves
  • 1/2 tsp ground turmeric
  • 3/4 tsp ground cinnamon
  • 1/2 tsp ground cardamom
  • 4 green chillies, finely chopped (remove seeds for less heat)
  • 5 tbsp red wine vinegar
  • 2 tbsp soft brown sugar
  • 1 tbsp tamarind paste
  • 3 tbsp mixed garlic and ginger paste

Method:

Firstly for this recipe we start with the marinade.  Place all the marinade ingredients into a large bowl and stir until you have a smooth paste.  Add the pork and mix well until coated.  Cover and leave the pork to marinate in the fridge for at least an hour (preferably overnight).

When you are ready to cook, heat the oil in a small saucepan over a low heat, add the garlic and allow to cook for around 20 minutes, make sure you don’t let the garlic burn!  Transfer the garlic to a plate and set aside, add a splash more oil, turn the heat up and add the mustard seeds, when they start to pop add the curry leaves and fry for 30 seconds or so before adding the chopped onion.  Turn the heat down and fry for 10 minutes or until the onions are soft and translucent.  Add the tomatoes, chilli powder, bay leaves and the pork (with all the marinade), stir well before emptying the mixture into a large casserole dish then pour in just enough water to cover the pork.  Place the casserole dish into a preheated oven (160 degrees) and cook for at least 2 hours or until the pork is tender.  I would recommend you check the dish after each hour just to ensure more water is required.

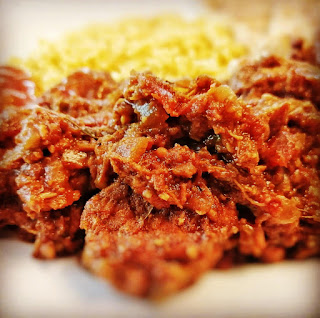
When the pork is cooked, check for seasoning, adding salt if required, stir in the garlic and serve. We had this with the usual rice, dips, chutney and naans.  

There is a great flavour to this dish, nice bit of heat but not enough to make you reach for the water, one I will definitely be making again.

Pork Vindaloo
Pork Vindaloo


Wednesday 28 April 2021

Mostro Pizza Review


Mostro Pizza
Mostro Pizza Chicken BBQ

There is a buzz around Crawley at the moment, Mostro Pizza has come to town, the worlds first takeaway that cooks your food outside your door.

Mostro Pizza launched in January of this year serving the people of East Grinstead, they now have a second van and have come to Crawley, amidst much excitement.  Such a fantastic concept, you book a 15 minute slot, a pizza van comes to your house and cooks you fresh pizza on your doorstep (not literally, they do use a pizza oven!) in 90 seconds, you don’t get much fresher than that!

There are a great variety of pizza offerings including vegan options.  We ordered La Mostro (The Monster), a tomato base with nduja sausage, pepperoni, red onion, mozzarella, fresh chilli and roquito peppers, we also opted for the pepperoni Classico, chicken bbq and a couple of the pizza breads, garlic, rosemary & mozzarella and Mostro chilli cheese.

As well as the pizzas and pizza breads they also offer a selection of salads, gelato and soft drinks.

Mostro Pizza
Jonny and Dre of Mostro Pizza

Bang on time, the Crawley van arrives with the lovely Jonny and Dre who were to prepare our food.  They parked up on the driveway and opened the sides of the van to reveal the pizza oven and loads of little compartments containing all the ingredients.  

Mostro Pizza


The pizza dough is pre measured so each portion is identical, Jonny and Dre then set about making our pizzas.  We had the full show, they stretched the pizza by hand, bit of theatrics thrown in, the kids loved it (ok, so did we..)

Mostro Pizza


They soon had the bases ready which they topped with their secret tomato sauce (I will do my best to get the recipe!) and then loaded them up with toppings.  

Mostro Pizza

Each Pizza went onto the spade of doom (that’s what the kids named it) and was placed into the pizza oven, in no time at all (90 seconds to be precise) they were cooked to perfection.  


Hot and fresh from the oven!

Jonny and Dre then made our pizza breads, boxed it all up and that was it, our order was ready!  We bid our farewells and headed in to get stuck into a slice of what we now know is pizza heaven!

The finished products - all boxed and ready to eat!

 Don’t get me wrong, we have all enjoyed a takeaway pizza, but by the time it gets to you, whilst nice, it loses a little something in the journey to get to your door, no such worries with Mostro Pizza, it is as fresh as you can get. 

Mostro Pizza
La Mostro, made fresh on our drive!

 Not only did the pizza and pizza bread look great, they tasted great as well, the pizza was light, the blistered burnt bubbles just added to the flavour alongside the fantastic toppings, the pepperoni was a little spicy for our youngest but we loved it, nice little hit of heat. 

Our fresh pizza breads from Mostro Pizza

 Anyone who knows us knows we like a good kick of heat so definitely next time we will request extra chilli on our La Mostro and Mostro chilli cheese bread.  The pizza breads were light and tasty but as a personal preference, I will see if we can get extra garlic next time, I like to know that if I were to run into a vampire, I would be able to see them off with my garlic breath!

I have to say, I really think the future of the takeaway is here, fantastic concept, really great service and outstanding food all cooked to perfection on your doorstep, what more could you ask for! As well as cooking your food on your doorstep you can also arrange to book them for events, taste experiences and pizza making parties!

Mostro Pizza deliver Wednesday to Sunday - 4pm till 9pm, minimum order only £20, book your slot at Mostropizza.co.uk

I posed a few questions to the lovely guys at Mostro Pizza and this is what they had to say.

Q:  How did the name Mostro (monster) pizza come about?

A: Mostro is Italian for Monster and that’s the feeling and image we wanted for the trucks when they are out on the road. To look distinctive, like something you haven’t seen before and for neighbours to be peeking out the door when we are in their road making and cooking pizzas. We wanted to tip our hat to the Italian inspiration of the Neapolitan style dough we make and Mostro Pizza had the right ring to it!

Q: Launching during a pandemic, some might think it was a risky move, what made you do it then?

A: Its fair to say that necessity is the Mother of Invention, we own a corporate catering business, supplying business lunches and catering large events and come March 2020 we lost 90% of our income. We had just imported an amazing pizza oven from Italy for a new contract we had just won. All of those events were cancelled overnight so we had to decide what to do with all this equipment we just purchased.

We wanted to keep as many staff on the books as possible so thought about how we could create a COVID safe operation. Most Pizza trucks are big and you all stand inside for hours on end with poor ventilation, we didn’t want to have to ask staff to do that in the current climate. So we built a vehicle that you would access the oven and the prep area from the side so staff can maintain social distancing and are outside. The vehicle we have chosen is small enough to park on peoples drives and when we started making the pizzas we just new they were too good when served fresh from the oven. As soon as you put these type of pizzas in a box for 20 minutes they lose what makes them so special so the only way to deliver the best quality pizza is to take the oven to the customer!

Of course it is a risk but one we were happy to take and so far the response we have had from our customers is overwhelming!

Q: you have a good range of pizzas, are customers able to customise their pizza if they fancy something a little different?

A: As our pizza are made fresh outside the customers home all you need to do is ask the chef to add a topping or take one off! We are developing a Mostro App will allow more flexibility for changing toppings as well.

Q: What are your plans with the menu for the future, any chance we will see calzone or fresh pasta dishes served alongside the pizzas and sides you currently have?

A: We have just tweaked the menu to offer more variety for sides, twists on the our garlic bread, using either pumpkin or truffle paste and added some new options for more traditionally popular pizzas such as a BBQ base and a slightly less spicy pepperoni! We are pizza specialists so no plans to add pasta options to these trucks…

Q: What is the future for Mostro Pizza, any plans to perhaps open a restaurant or will you remain mobile with more pizza vans in the fleet?

A: We feel that this is the Future of Takeaways, food prepared and cooked at the door to provide the best possible experience and meal to the customer. With the explosion in food delivery apps customers have more options and they might provide convenience but food made in ‘Dark Kitchens’ and then on a bike riders back for 20 minutes doesn’t put the customer first. The result is usually food that is warm rather than hot with so much single use plastic and packaging. We wanted to put the customer at the heart of our business so the plan is to build more trucks and expand our areas so we can bring the freshest and hottest pizzas to more neighbourhoods. The short term – over the next 2 months is covering the whole of Crawley from our initial launch in Pound Hill and Maidenbower. We would hope to bring on Franchise partners at some point to help us grow!

Q: Having seen some videos you clearly know how to stretch the dough when making your pizzas, where did you learn your craft or is this something you learnt when deciding on this style of cuisine?

A: The only way you become good at throwing and stretching pizza is practice! We spoke to a very experienced pizza chef to talk to us about dough and how to improve our skills which was invaluable, but at the end of the day it’s the time making 1000’s of pizzas that make Mostro Pizzas what they are. With an expanding team we are employing great pizza chefs who have the same passion we have for great ingredients made and cooked in the right way so our customers get not just amazing food but a great experience from the moment we arrive at their homes.

https://www.facebook.com/MostroPizzaUK/

https://www.mostropizza.co.uk/

Saturday 13 March 2021

Balti Dhal Fry


Balti Dhal Fry
Balti Dhal Fry

  • 2 tbsp coconut oil
  • 2 cloves
  • Cinnamon stick
  • 2 chillies, finely chopped (remove the seeds for less heat)
  • 1/2 brown onion, finely chopped
  • 2 large tomatoes, seeds removed and diced
  • Handful of chopped coriander stalks
  • 4 garlic cloves, minced
  • 1 tsp chilli powder
  • 1/2 tsp ground turmeric
  • 1/2 tsp ground cumin
  • 1/2 tsp ground coriander
  • 200g of cooked chana dhal (refer to packet for instructions)
  • Salt and pepper to season
  • Finely chopped coriander leaves to garnish

For the tarka
  • 2 tbsp ghee or rapeseed oil
  • 3 dried chillies
  • 1 tsp cumin seeds
  • Small pinch of asafoetida

Method
Melt the coconut oil in a saucepan.  When hot, add the cloves and cinnamon stick and let them fry for 30 seconds before adding the chopped onion.  Fry for 3 minutes until the onion softens then add the chillies, tomato, coriander stalks, garlic and spices, stir well before adding the cooked lentils, simmer over a low heat whilst you make the tarka.

To make the tarka, heat the ghee or oil in a small pan. When hot add the chillies, cumin seeds and asafoetida and let it sizzle for 30 seconds before pouring over the dhal.  Season with salt and pepper and a sprinkle of coriander.

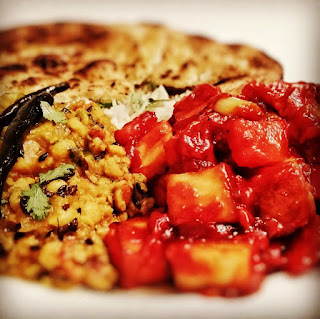
We enjoyed this dish alongside some basmati rice and chilli paneer with some spicy naan bread, it was so tasty, I hope you enjoy!

Saturday 6 March 2021

Chicken Masala Curry


Chicken Masala Curry

  • 3 chicken breasts cut into chunks
  • 3 tbsp rapeseed oil
  • 1 tsp mustard seeds
  • 1” piece of cinnamon
  • 10 curry leaves (if you have them)
  • 2 tbsp garlic and ginger paste
  • 2 chillies, chopped finely
  • 2 tbsp curry powder
  • 3 tbsp tomato purĆ©e
  • 400 ml base curry sauce (add link to recipe)
  • 200ml coconut milk
  • 2 tbsp light soy sauce
  • 1 tsp garam masala
  • Handful of finely chopped coriander
Method
Heat the oil in a large pan, when hot add the mustard seeds and cinnamon stick and fry until the mustard seeds start to pop, add the curry leaves (if you have them) and fry for 30 seconds or so.  Mix in the garlic and ginger paste and fry for a couple of minutes until it starts to sizzle.  Add the curry powder, tomato purĆ©e and half of the base curry sauce, stir through and bring to a simmer, add the chicken and the remainder of the base curry sauce and cook until the chicken is cooked through.  Next add the coconut milk, soy sauce and coriander and cook for a few minutes, season with salt and pepper and serve.

This is a nice creamy curry with just a bit of heat, I served this with rice, poppadum's, pickles and chutney, a really tasty fakeaway to enjoy in the comfort of your own home.  The sauce can be made in advance and just finish off with the chicken once you are wanting to eat, the chicken will cook in minutes!  I hope you enjoy this as much as we did.


Sunday 14 February 2021

Chicken Chaat


Chicken Chaat
Chicken Chaat

There are two stages to this curry, the first is to make the base curry sauce, this base can be used to make a number of different curries but for this recipe we will be using it to make chicken chaat.

Base curry
  • 2 tbsp rapeseed oil
  • 2 brown onions, finely chopped
  • 1 pepper, seeded and finely chopped
  • 1 large tomato, seeded and finely chopped
  • 1 tbsp garlic and ginger paste
  • 1/4 tsp turmeric
  • 1/4 tsp ground fenugreek
  • 1/2 tsp ground cumin
  • 1/2 tsp ground coriander
  • 1/2 tsp paprika
  • 1 litre of water

Heat the oil in large pan over a medium heat.  Add the onions and peppers and sautĆ© until softened and then add the remaining ingredients but not the water.  Stir everything well and fry for a minute or so before adding a quarter of the water.  Turn the heat up and let the sauce simmer until the water has evaporated by around half.  Add another quarter of the water and then blend the sauce with a stick blender or transfer to a blender and blitz until smooth.  Add the remaining water and that pretty much is it, the sauce should be quite thin at this stage which is how it should be.  This recipe will make 3 portions of base curry sauce, so you can freeze the other two portions (1 and 3/4 cups per portion).

Now on to make the chicken chaat

  • 3 tbsp rapeseed oil
  • 1 brown onion, finely chopped
  • 2 tbsp garlic and ginger paste
  • 2 tbsp good quality curry powder
  • 1 tsp chilli powder
  • 2 tbsp chaat masala
  • Third of a tube of tomato purĆ©e
  • 1 and 3/4 cups of base curry sauce
  • 800g of cooked chicken
  • 1/3 cucumber, peeled and deseeded and cut into chunks
  • 1 pepper, deseeded and roughly chopped
  • 150g drained chickpeas
  • 1 large tomato cut into wedges
  • Big pinch of salt
  • Handful of chopped coriander

Heat the oil in a large frying pan, add the onion and fry until softened.  Add the garlic/ginger paste and stir through and allow to sizzle for a minute.  Next mix in the curry powder, chilli powder, chaat masala and the tomato purĆ©e.  Let this sizzle for another minute before adding the base curry sauce and let it simmer for 5 minutes before adding the chicken and let it cook for 10 minutes before adding the cucumber, chickpeas, pepper and tomato wedges and a good pinch of salt, stir through and cook for a further couple of minutes before serving with a sprinkle of the coriander on top.

I served the curry with basmati rice, naan bread, pickles and tomato, onion, coriander chutney and a selection of bhajis and samosas and boy was it good.  This recipe will serve 4 comfortably and more if you are making additional dishes to accompany the chaat.  

This is so quick and easy to make, I made the base sauce earlier in the day and then it took no time at all to make the chicken chaat.  Watch this space for other curry recipes to make using the base curry sauce!


Sunday 7 February 2021

Rajma - Red Kidney Bean Curry


Rajma - Red kidney bean curry

  • 1 cup (240ml) dried red kidney beans
  • 5 cups (1 litre 250ml) water to soak the beans in
  • 2 large tomatoes, blitzed in the food processor
  • 1 tsp tomato purĆ©e, mix in small amount of water to dilute down
  • 2 dried red chillies
  • 2 fresh green chillies
  • 1/2 tsp cumin seeds
  • 2 bay leaves
  • 1/2 tsp asafoetida powder (available in supermarkets)
  • 2 tbsp rapeseed oil
  • 1/2 tsp turmeric powder
  • 1/2 tsp chilli powder
  • 1.5 tsp paprika
  • 1 tsp cumin powder
  • 1 tsp coriander powder
  • 1 tsp Garam masala
  • 1 tbsp Katsura methi powder (or dried fenugreek leaves)
  • Large handful of finely chopped coriander
  • 2 tbsp ginger/garlic paste
  • Salt to taste

Method:
Rinse the kidney beans and leave to soak overnight in 5 cups of water, for a minimum of 8 hours.

Switch on your Ninja foodi, add the kidney beans and water, switch lids to pressure cooker, make sure the valve is set to seal and pressure cook on high for 7 minutes.  Once the timer beeps, turn off the keep warm setting and leave for 10 minutes and then do a slow release of pressure.  At this stage the beans will be partially cooked, drain them and keep the water as this will be used later.

Now switch the Ninja to sautĆ© and set it to medium.  Heat the oil, add the cumin seeds, bay leaves, chillies and the asafoetida and leave to sizzle for a minute or so.  Add the ginger/garlic paste and fry off for another minute or so(turn the heat down if getting too hot).  Add your blitzed tomatoes and mix through, add the turmeric, cumin powder, coriander powder, paprika, chilli powder and good pinch of salt, stir and leave to sautĆ© for another minute.

In the next step, add the diluted tomato purĆ©e and the kidney beans, give a good mix then add the coriander leaves, kasturi methi and the garam masala, stir through and leave to sautĆ© for around 5 minutes.  Next add the reserved water to the pan, mix well then return to pressure cooker mode (switching lids) and cook on high for 30 minutes.  Once the time is up do a quick release of steam and check the consistency of the curry, if a bit thin for your liking sautĆ© until it thickens up or if too thick add some water to thin out.

This was my first proper recipe I had tried in my Ninja and I have to say it was so straight forward and the end result was fantastic.  The house was filled with amazing aromas and I couldn’t wait to get stuck in!  We are big chilli fiends in this house so the heat wasn’t a problem for us but if you like your curry a bit milder adjust the ingredients accordingly.

I served the curry with basmati rice, naan breads, coriander and mint sauce, onion bhaji, vegetable pakoras and pickles. 
Dinner was a huge hit, the flavours were amazing, I will definitely been doing this again, the recipe serves 4 comfortably.  I hope you enjoy as much as we did, now what to cook next!

Saturday 30 January 2021

Kala Chana Curry


Kala Chana curry
Kala Chana Curry

  • 200g kala chana (yellow chana), soaked overnight in 625ml water.
  • 1/2 tsp baking soda
  • 2 tbsp ghee or vegetable oil
  • 1 tsp ground cumin
  • 1 tsp ground coriander
  • 1 tsp chilli powder
  • 1 tsp mustard seeds
  • 10 curry leaves
  • 1/2 tsp asafoetida
  • 1/4 tsp ground turmeric
  • 2 tbsp garlic and chilli paste
  • 1 onion, finely chopped
  • 2 green chillies
  • 2 tomatoes, seeds removed and diced
  • 200g coconut milk
  • Large pinch of salt

Method:
Pour the soaked kala chana with the water into a large saucepan, add the baking soda, simmer over a medium heat for around 30 minutes or until tender.  Don’t worry about any foam that rises to the top, just skim this off.  Once cooked, set aside.

Heat the ghee or oil in a large frying pan over a high heat.  When hot add the mustard seeds and when they start to pop turn down the heat and stir in the curry leaves.  Once you get hit with the aromas stir in the asafoetida, ground coriander, chilli powder, cumin and turmeric.  Let this sizzle for a minute then add the onions and fry until soft and translucent.  Stir through the garlic and ginger paste along with the chillies (leave these whole) then add the tomatoes, mix well then add the coconut milk along with the kala chana and any remaining cooking water, let this simmer for 10 minutes or so until it thickens slightly, add salt to taste then serve.

All of the above ingredients are available in most supermarkets or your local Indian supermarket.  I have to say I had never heard of asafoetida but I found this online with Ocado.  It doesn’t smell very nice but once fried it improves, trust me!

We had this alongside my chilli paneer, rice and papadams and my mint and coriander sauce, mango chutney and a selection of pickles I picked up from the Indian supermarket.  This was a huge hit, so tasty and full of flavour, the aromas were amazing, give it a go and let me know what you think!

Kala Chana Curry, Chilli paneer, mint and coriander sauce with mango chutney


Sunday 24 January 2021

Chilli Paneer


Chilli Paneer

  • 3 tbsp rapeseed oil
  • 200g cubed paneer
  • 2 bell peppers cut into chunks
  • 3 spring onions roughly chopped
  • 1 chilli finely chopped
For the sauce
  • 250ml tomato ketchup
  • 3 tbsp hot sauce (of choice)
  • 4 minced garlic cloves
  • 2 inch piece of ginger, finely chopped
  • 1 tbsp cornflour
  • 2 tbsp light soy sauce
  • Big pinch of salt
  • Good few grinds of fresh black pepper
This is a great dish to prepare ahead, firstly put all of the ingredients for the sauce into a measuring jug/bowl and whisk together, it’s as simple as that!  Leave to one side until ready to cook the rest of the dish.

Heat the oil in a large frying pan, add the paneer and cook until browned.  Add the peppers, spring onions and chilli and fry until cooked through but still retaining some crispness.  Add the sauce, stir through and cook until heated through. 

If you are not a fan of too much chilli you can leave out the chilli and reduce the amount of hot sauce or add more if you are a heat fiend! 

 This is a great dish to have with rice, it makes enough for 2 people or more if serving alongside other dishes.  This dish is quick and easy and a great meat free Monday dish. 

Chilli Paneer


Saturday 16 January 2021

Homemade Doner Kebab


Homemade Doner Kebab

  • 500g minced beef
  • 1 small onion, finely chopped
  • 4 tbsp natural yoghurt
  • 2 tbsp milk
  • 1 tsp ground coriander
  • 1 tsp ground cumin
  • 1 tsp dried oregano
  • 1 tsp chilli flakes
  • 1/2 tsp garlic granules
  • Ground black pepper
  • Large pinch of salt

Method:
Place the mince meat into a large bowl, add the yoghurt, milk, onion, spices and seasoning and mix together until fully combined.  Put the mixture into a loaf tin and leave to sit in the fridge for at least an hour (longer if you have the time). 

Homemade Doner Kebab

Preheat the oven to 180 degrees, put the loaf tin onto a baking tray and cook in the oven for 30 minutes or until cooked through.  Remove from the oven, cover with foil and leave to rest for 15 minutes before thinly slicing.

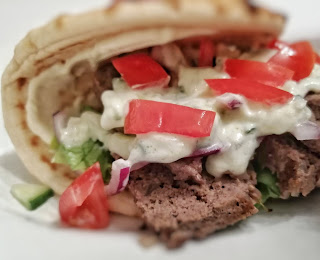
I served my kebab on flatbreads with salad, tomatoes, cucumber, red onion and homemade tzatziki.  Pittas are also great for this dish, giving you that real takeaway feel.  You can leave out the chilli flakes if you don’t want a spicy kick or put more in if you prefer it hotter!  

Likewise you can drizzle over your hot sauce of choice if you really want to add the heat.  This is a great fakeaway for the weekend and pretty healthy too if using lean mince (not too lean though as you need some fat in the kebab).  Hope you enjoy as much as we did.