Share

Saturday 21 December 2019

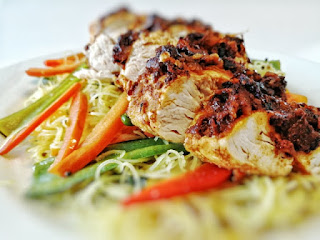
Chilli Chicken

Chilli Chicken
  • 4 chicken breasts cut into bite sized chunks
  • Oil for frying
Batter
  • 2 tbsp corn flour
  • 1 tbsp plain flour
  • ½ tsp chilli powder 
  • ½ tsp ground black pepper powder
  • Pinch of salt
  • 1 tbsp vinegar
  • 3 tbsp water
For the sauce
  • 2 tbsp vegetable oil
  • 4 spring onions finely chopped (keep green ends for garnish)
  • 2 green chilli cut in three 
  • 5 garlic cloves finely chopped
  • ½" ginger finely chopped
  • 2 green pepper diced
  • 1 red onion diced
  • 1 tbsp chilli garlic sauce
  • 3 tbsp Kecap manis
  • 50ml water
  • 1 tsp corn flour mixed with 3 tsp of water
  • Pinch of salt
Heat the oil in a deep wide sauce pan or a wok, approx 1cm deep.  In a mixing bowl add the corn flour, plain flour, chilli powder, black pepper and salt. Add the vinegar and water; mix to make a thick batter. Add the chicken pieces to it and mix well coating all the pieces with the batter.

Fry the chicken in the hot oil in batches for 1-2 minutes until lightly coloured all over. Drain the chicken on kitchen paper and set aside.

To make the sauce; refresh the oil in your pan/wok and heat on a medium heat.  Add the white part of the spring onions and fry for a few seconds followed by the green chilli, chopped garlic and chopped ginger. Fry for 10 seconds and add the green peppers along with the red onions. Sauté for 1-2 minutes until softened.

Add the chilli garlic sauce and the Kercap manis and stir well. Add the water and bring to a boil and simmer for a 1 minute on a low heat. Add the corn flour water mix, season to taste and simmer for a further 2 minutes as it begins to thicken. Turn the heat off and cool the sauce slightly.

When you’re ready to serve add the fried chicken pieces to the gravy, stirring well making sure to coat all the pieces with the sauce evenly. Simmer the sauce on a low heat for a minute. Serve with fried rice and garnish with the green part of the chopped spring onions.

Another tasty takeaway dish that you can make in the comfort of your own home.  This recipe feeds 4 and I can guarantee it will be a hit with you and your friends.  As usual, you can adjust the chilli powder and amount of chillies to suit your taste.

Sunday 8 December 2019

Strawberry Cero

Strawberry Cero Cocktail

  • 1 measure of non alcoholic botanical spirit 
  • 25ml rose syrup
  • 200ml hibiscus tonic
  • Strawberry
  • Mint sprigs
  • Black peppercorns
  • Ice


Add the non alcoholic spirit to a cocktail shaker along with the syrup and a handful of ice.  Shake well and pour the drink (excluding the ice) into a suitable glass, garnish with a strawberry and the mint, add a few peppercorns to the glass and enjoy!

As party season is upon us, if you are the designated driver you can feel like you are missing out or indeed for those who don’t drink, the same old fruit juices and fizzy drinks get a bit samey, then this mocktail is for you.

I came across a brand of non alcoholic spirits but at over £20.00 a bottle I know people would begrudge paying that, why would you when you can buy alcohol for less!  I then stumbled across this particular brand at a leading budget supermarket for half the price!  With promises of juniper, coriander, hibiscus and lingonberry, it sounded like a good gin, but minus the alcohol.

I have to say, this tasted amazing and hard to tell there was no alcohol, the peppercorns gave a little spicy hit to the drink which was light, fruity and refreshing.  You will love this if you are a gin fan, it certainly is like a gin cocktail but without any alcohol whatsoever, go on, give it a try.  This will also be perfect with dry January just around the corner!


Sunday 17 November 2019

Chicken Gyros

Chicken Gyros
  • 2 chicken breasts
  • 3 large cloves of garlic
  • 1 large tbsp dried oregano
  • 8 tbsp Greek yoghurt
  • 1 tbsp white wine vinegar
  • 4 tbsp lemon juice
  • 2 tbsp olive oil
  • 1 large cucumber
  • 2 tomatoes
  • 1/2 red onion, finely chopped
  • Salt and pepper
  • 2 flat breads

Method:
In a large bowl, add 3 tbsp of yoghurt, 2 cloves of minced garlic, 1 tbsp white wine vinegar, 1 tbsp olive oil, 3 tbsp lemon juice, oregano and a good pinch of salt and pepper, mix thoroughly, add the chicken breasts and coat with the marinade then place into the fridge for 2 hours.

Whilst the chicken is marinading we will make the tzatziki and salad to go with the gyros.  Using a box grater, grate half of the cucumber and place into a bowl along with 5 tbsp of yogurt.  Add 1 tbsp olive oil, lemon juice, 1 clove of minced garlic and a good pinch of salt and pepper, mix thoroughly and place into the fridge.

To make the salad, cut the remainder of the cucumber into bite sized chunks and place into a bowl, deseed the tomatoes and cut into small pieces, add these to the bowl along with the chopped onion mix together then place into the fridge.

Once the chicken has marinaded, turn your grill onto high, place the chicken breasts onto a tray (I would recommend placing tin foil onto the tray) and cook for around 20-30 minutes, turning once, until the chicken is cooked through.  Cooking time will vary depending on the thickness of your chicken.  Alternatively you can cook the chicken on a griddle pan.

Now the chicken has cooked, place onto a chopping board and leave to rest for 5 minutes.  Heat your flatbreads in the oven for a couple of minutes.  Slice your chicken into chunks and place onto the flatbread with a good portion of the tzatziki and salad.

This dish is so fresh and tasty, trust me, you won’t be disappointed!  Next time I’m going to try this with some halloumi which will go just as well as the chicken.  Hope you enjoy.

Sunday 10 November 2019

Chicken Nachos

Chicken Nachos
  • 2 chicken breasts
  • Large bag of tortilla chips
  • Grated cheddar cheese (as much as you like)
  • Handful of sliced jalapeño peppers
  • 2 tbsp olive oil
  • 2 tbsp tomato purée
  • 2 tsp sugar
  • 250ml chicken stock
  • 3 tbsp lime juice
  • 2 garlic cloves, minced
  • 1 tsp dried oregano
  • 1 tsp cumin powder
  • 1 tsp paprika
  • 1/4 tsp cayenne pepper
  • Salt and pepper to season
  • Small tin of sweetcorn, drained
  • Small tin of retried beans

Method
In a large bowl, mix together 1 tbsp olive oil, the lime juice, garlic, oregano, cumin, paprika, cayenne pepper and a pinch of salt and pepper.  Add a couple of tablespoons of the chicken stock and mix to form a paste, add the chicken and coat with the mixture.

Heat the remaining olive oil in a frying pan and cook the chicken for 20 minutes, turning as you go until the chicken is cooked through, then set aside.  Add the chicken stock to the pan along with the tomato purée, sugar and any remaining marinade mix, stir through and simmer until the sauce thickens.  Shred the chicken using two forks and return to the frying pan, mix thoroughly to ensure the chicken gets a good coating of sauce.

Preheat your oven to 180 degrees.  Place a layer of tortilla chips on two dinner plates, top with grated cheese and some of the chicken mixture.  Top with the remaining chips and the chicken and sprinkle over some sweetcorn, refrained beans, jalapeño peppers and some more cheese.  Place the plates into the oven for 5-10 minutes or until the cheese melts.  Serve with some homemade guacamole, sour cream, salsa and hot sauce.

This is comfort food at its best, the chicken packs a punch and has plenty of flavour, I guarantee this recipe will soon become a firm favourite and again, it is quick and easy to make, I hope you enjoy as much as we did.

Sunday 3 November 2019

Thai Meatball Banh Mi

Thai Meatball Banh Mi
  • 2 medium red chillies, thinly sliced
  • 2 tbsp clear honey
  • 3 tbsp fish sauce
  • 5 spring onions, (finely chop 4, reserve 1)
  • 1 clove of garlic, minced
  • 450g minced pork
  • 2 tsp lemongrass, finely chopped
  • 1 tbsp finely chopped mint
  • 2 tbsp finely chopped coriander
  • 1 tsp cornflour
  • 2 baguettes
  • 1 small carrot, thinly sliced
  • Handful of rocket
  • Rice wine vinegar
  • 1 tbsp sugar
  • Lime wedges
  • Sweet chilli sauce
Method:
Place the pork into a medium mixing bowl, add the honey, fish sauce, 4 sliced spring onions, garlic, lemongrass, cornflour, mint, coriander and one sliced chilli.  Mix until well combined and then form into 20 balls and place onto a baking tray then place in the fridge for around an hour to firm up.

Preheat your oven to 180 degrees.  Place the meatballs onto a baking tray and cook in the oven for 30 minutes until cooked through.

Whilst the meatballs are cooking, thinly slice the remaining spring onion and place into a bowl along with the carrot, cover with rice wine vinegar and add the sugar, leave for at least 15 minutes

When the meatballs are cooked, slice open your baguettes, fill with rocket then top with the meatballs and garnish with your pickled vegetables and the remaining red chilli and drizzle with the chilli sauce and place the lime wedges on the side to squeeze over the baguette.

This is a fantastic recipe, packed full of flavour and given the chillies, it has plenty of heat so be warned!  Quick and easy which is how we like it, this recipe is so tasty you will be making it time and time again.  

As the recipe makes 20 meatballs there are enough to make 4 baguettes however I only needed 2 so froze the remaining meatballs to use another day.


Sunday 13 October 2019

Nasi Goreng

Nasi Goreng
  • Vegetable oil - 3 tbsp
  • 2 chicken breasts, cut into large chunks
  • 2 x 250g microwaveable pouches basmati rice
  • 2 eggs, beaten
  • 2 tbsp kecap manis
  • 1 tbsp fish sauce
  • Juice of 1 lime
Nasi Goreng Paste
  • 2 shallots, chopped
  • 1 stick of lemongrass, finely chopped
  • Thumb sized piece of ginger, cut into matchsticks
  • 2 cloves of garlic, minced
  • 2 tsp tomato purée
  • 1 Birdseye chilli, sliced 
  • 1 tbsp brown sugar
To Serve
  • 2 spring onions, finely sliced
  • Crispy fried shallots (finely slice a shallot and shallow fry in oil until crispy)
  • 4 fried eggs
  • Sambal or sriracha hot sauce
  • 1 red chilli, finely sliced
Method:
Firstly make the paste by placing all the ingredients into a food processor with 2 tbsp of cold water and blend until you have a smooth paste.
Heat 2 tbsp of the vegetable oil in a wok or large deep frying pan until the oil is hot.  Add the chicken chunks and cook until browned all over, remove and set aside, once cooled, shred the chicken.
Reduce the heat under the wok, add the remaining tbsp of oil and the paste and cook for 10 minutes, stirring occasionally.  Turn up the heat under the wok, add the cooked rice and cook for 3 minutes.  Make a well in the centre of the rice and add the beaten egg, once this has cooked, chop up and mix through the rice mixture.
Add the fish sauce, lime juice, kecap manis and the chicken, season and cook for 5 minutes until hot and cooked through. 
Plate up the Nasi Goreng and top with a fried egg, crispy shallots, chilli slices, spring onions and sambal or sriracha sauce.

This is my version of Nasi Goreng which is a traditional Indonesian breakfast dish, however it is quite substantial and can be eaten any time of the day.  I haven’t included shrimp paste which is generally used as I find the taste too strong but you can add a teaspoon to the paste mixture if you wish. 
Kecap Manis is an Indonesian sauce, often found in the Asian aisle of your supermarket - you can use soy sauce and brown sugar as an alternative.  
I have also cut down on the amount of chilli, you can obviously adjust accordingly.  

This is a great tasting dish, you can add shrimp or pork as well, depending on your tastes, pimp up the chilli and you will guarantee to clear and winter sniffles!


Sunday 6 October 2019

Thai Basil Beef - Pad Gra Prow

Thai Basil Beef - Pad Gra Prow
  • 2 tablespoons oil
  • 380g bavette steak, sliced thinly against the grain and mixed with 1 teaspoon oil and 2 teaspoons cornstarch
  • 5 cloves garlic (chopped)
  • ½ of a red bell pepper (sliced thinly)
  • 1 small onion (thinly sliced)
  • 2 teaspoons soy sauce
  • 1 teaspoon dark soy sauce
  • 1 teaspoon oyster sauce
  • 1 tablespoon fish sauce
  • ½ teaspoon sugar
  • 1 cup thai basil leaves 
  • Coriander (to garnish)
  • 1 green chilli, thinly sliced 
  • Thumbnail sized piece of fresh ginger cut into matchstick strips


Heat your wok over high heat, add the oil and then brown the steak, remove and set aside.

Add the garlic, red pepper, ginger and chilli to the wok and stir-fry for about 30 seconds. Add the onions and stir-fry until browned.  Return the beef back to the wok and add the soy sauce, dark soy sauce, oyster sauce, fish sauce, and sugar. Stir-fry for another few seconds, and then fold in the Thai basil until it’s just wilted. Serve with jasmine rice, and garnish with coriander.

This is my version of Pad Gra Prow, yet again another quick and easy recipe, packed with flavour and it also packs a punch with the chilli, you can omit the chilli or reduce the amount used to suit your tastebuds.  Using this cut of steak is perfect as it is very tender, don’t over cook it though as that’s when it turns chewy.  A massive hit in our household and I can’t wait to make it again.

Saturday 21 September 2019

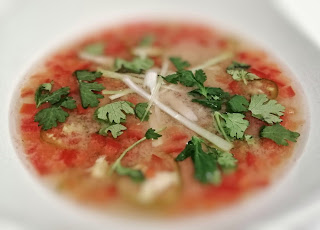
Tom Yum Soup

Tom Yum Soup
  • 500g organic chicken pho broth
  • 6 lime leaves, bruised
  • 6 coriander stems, bruised
  • 3 tbsp fish sauce
  • 4 tbsp lime juice
  • 1 tsp galangal paste
  • 1 large green chilli, thinly sliced
  • 1 lemongrass stalk, bruised and cut into several pieces
  • 1 tomato, deseeded and cut into small cubes
  • 150g raw king prawns, deveined 
  • Small pinch of fresh coriander, to garnish
Method
Place the chicken broth into a medium sized pan and bring to a slow boil.  Add the galangal, lime leaves, coriander stems and lemongrass, simmer for around 10 minutes, basically we want to infuse the flavours into the broth.  

Add the fish sauce, lime juice, chillies, tomato and prawns to the pan and simmer until the prawns turn pink, divide between two bowls and garnish with the coriander.

We are both lovers of Thai food but it’s not something I have really made before.  We have always had this dish when eating out and love the hot and sour flavour so I thought I would give it a go and boy am I glad I did.  This soup is so flavoursome and has a real kick, definitely something to have when you are getting a cold, it will clear it straight up!  Whilst I have used pho broth you can use a chicken stock cube if you are unable to find the broth, I got mine from Ocado.  In the recipe, when I refer to bruising, basically this means you use the flat of a large chopping knife and bang down, bruising the ingredient.

I can honestly say this was on a par, if not better, than a lot of similar soups we have had in restaurants, you can swap the seafood for chicken or tofu, this is my version, I hope you enjoy.

Monday 26 August 2019

Pulled Jackfruit Taco

Pulled Jackfruit Taco

  • 565g tin of young green jackfruit, in water (drained and cut into bite size chunks)
  • 2 garlic cloves, minced
  • 1/2 red onion, finely chopped
  • 1/4 cup of vegetable stock
  • 3 tbsp lime juice
  • 1 tbsp olive oil
  • 3/4 tbsp oregano
  • 1/2 tbsp chilli powder 
  • 1 tsp ground cumin
  • 6 small flour tortillas
  • 1/2 red pepper, cut into thin batons
  • 2 spring onions, finely sliced
  • 2 radishes, thinly sliced 
  • Several tsps sour cream
  • Small handful of finely chopped coriander
  • 1 tbsp chopped jalapeño peppers

Heat the oil in a shallow casserole dish, sauté the onions and garlic until softened, add the jackfruit and the vegetable stock, cover and simmer for 15 minutes until the jackfruit is tender.  Once soft enough, using a potato masher, mash the jackfruit, it should start breaking up.  Once mashed, reserve a couple of tablespoons of the stock, place the dish containing the jackfruit into a preheated oven (180 degrees fan assisted) and cook for 15 minutes.  

Whilst the jackfruit is in the oven, mix the oregano, chilli powder, lime juice, cumin and reserved vegetable stock in a bowl.  Once the jackfruit has baked for 15 minutes stir through the spice mix and cook for a further 10 minutes.  When baking in the oven you should get some nice crispy bits to the jackfruit which give the appearance of crispy pork!

Once done, divide the jackfruit between your tacos, top each with a few slices of spring onions, pepper and radish along with a sprinkle of jalapeño, corriander and a small dollop of sour cream and get stuck in!  

I have to say I was a bit doubtful but I can honestly say, this really was like eating pulled pork!  The jackfruit soaks up the flavours that it is cooked with, obviously you can spice up your taco seasoning mix or just add ready made bbq sauce, hot sauce or whatever sauce you want, the choice is yours!  Now this is a proper meat free Monday dish, enjoy.


Sunday 18 August 2019

Chicken, broccoli and sweetcorn fritters

Chicken, broccoli and sweetcorn fritters
500g chicken breast (chopped into small bite sized pieces)
100g sweetcorn (drained)
Handful of cooked broccoli florets (chopped)
1/4 cup of plain flour
1/4 cup grated Parmesan cheese
1 clove of garlic (minced)
Salt & Pepper
Vegetable oil
1 egg (beaten)

In a large bowl mix together the chicken, flour, Parmesan, garlic, broccoli, sweetcorn and the egg.  Season with a couple of pinches of salt and a good few grinds of freshly ground black pepper.

Add enough oil to a large frying pan (enough to coat the bottom of the pan) and heat over a medium flame.  Using a tablespoon, spoon the mixture into the pan, you should have enough to make 6 fritters, flatten the mixture down to make a patty, shape and fry for several minutes each side until crispy and cooked through, remove from the pan and place onto some kitchen roll to absorb any excess oil.  

I served these fritters with some peri peri fries and habanero mayonnaise but literally you can serve them with whatever you fancy, a good green salad would go equally well.  By the same token, you can mix the recipe up and add a variety of different veg.  By chopping the broccoli up it’s a great way to hide it from those kids who aren’t too keen on eating veg!  This recipe was so quick to put together, ideal when you are a bit short on time, hope you enjoy!


Tuesday 13 August 2019

Black Bean Nachos

Black Bean Nachos
  • 1 pepper, diced
  • 1 red onion, finely chopped
  • 197g tin of sweetcorn, drained
  • 400g black beans, drained and rinsed
  • 2 garlic cloves, minced
  • 400ml passata
  • Large handful of fresh coriander, leaves and stalks roughly chopped separately
  • 250ml vegetable stock
  • Bag of tortilla chips
  • Grated cheese
  • Chopped jalapeño peppers 
  • 1/2 tsp chilli powder
  • 1 tsp ground cumin
  • 3/4 tsp oregano
  • 2 tbsp olive oil
  • Salt and freshly ground black pepper

Heat the oil in a large flame-proof oven dish, add the onion and peppers and fry for 10 minutes until softened then add the garlic and fry for several minutes, stirring every so often.  Add the coriander stalks and spices, mix thoroughly and cook for a further minute or so then add the passata, seasoning, stock, sweetcorn and the black beans, stir and bring to a simmer.  Place the pan into a preheated oven (180 degrees) and bake for around 30 minutes, until the sauce is thickened.

To serve, place the tortilla chips onto two plates, top with 2 thirds of the cheese, add the beans, the remaining cheese and scatter over the jalapeño peppers, place the plates into the oven for several minutes until the cheese has melted.

This dish is perfect with sour cream, homemade guacamole and Pico de gallo.  This is a fantastic vegetarian dish and one that you can increase or decrease the heat as suits your tastebuds, you won’t be disappointed and you certainly won’t miss the fact there is no meat!  Yet again another simple yet really tasty meal, enjoy!


Tuesday 30 July 2019

Sausage and home made baked bean casserole


  • 400g home made baked beans (view baked been recipe)
  • 8 pork sausages (each one cut into 4 slices)
  • 1 large onion, finely diced
  • 1 carrot, peeled and cut into small bite size pieces
  • 1 pint vegetable stock
  • 2 tbsp vegetable oil
  • 1 tbsp English mustard
  • 3 tbsp chopped parsley
  • Pinch of salt
  • Few grinds of freshly ground black pepper

Heat the oil in a deep frying pan and cook the sausages until browned all over.  Add the carrots and onions and cook for a further 10 minutes until softened.  Add the stock, mustard, parsley, pepper and a pinch of salt, stir everything through and bring to the boil.  Add the homemade baked beans to the sausage mixture, stir, reduce the heat and simmer for 1 hour.  Once cooked through, divide the casserole between 4 bowls, sprinkle over some extra parsley and enjoy.

Whilst it is summer, on days like this, comfort food is called for!  You can use store bought baked beans however home made baked beans make this dish a bit more special.  Likewise use whichever sausages you prefer, there are a good variety of flavours out there so mix it up a bit, give some extra flavour to the dish.  I served this with some mashed potato and it went down a treat.

Monday 8 July 2019

Crispy breaded chicken & sweetcorn salad with jalapeño and garlic ranch dressing

Crispy breaded chicken & sweetcorn salad with jalapeño and garlic ranch dressing

  • 1-2 Tbsp roughly chopped pickled jalapeno 
  • 1 medium garlic clove, minced
  • 2 Tbsp roughly chopped red onion
  • 1 Tbsp fresh lime juice
  • 355ml mayonnaise 
  • 237ml of buttermilk
  • 1118ml of sour cream
  • Small handful of coriander leaves
  • 1/2 tsp sugar
  • 2 sliced chicken breasts
  • Golden breadcrumbs
  • 1 beaten egg
  • Handful of plain flour
  • Vegetable oil
  • Salad leaves
  • Chopped cherry tomatoes
  • 1 ripe avocado sliced
  • Large handful of corn kernels 


In a food processor add the roughly chopped pickled jalapenos, garlic cloves, chopped onion and lime juice. Add the mayonnaise, buttermilk, sour cream, coriander,  garlic, and sugar, pour into a container and place into the fridge.

Place the breadcrumbs, beaten egg and flour into separate bowls.  Dip the sliced chicken into the egg then the flour and lastly the breadcrumbs until all pieces are well coated.

Pour enough vegetable oil into a large frying pan to cover the base by about half inch deep, heat and then add the coated chicken strips, cook for around 20 minutes or so until cooked through and crispy.  Remove from the pan and place onto some kitchen paper to soak up any excess oil.

Plate up your salad, top with the avocado, corn and tomatoes, add the chicken strips and drizzle over the ranch dressing.

This is an amazing salad, perfect for summer.  You can dry fry the sweetcorn to add some charred edges to it, also with the dressing you can increase the heat by adding some fresh chopped jalapeño pepper, adjust it however suits your tastes.  The dressing can be kept in the fridge for up to 5 days.

Tuesday 25 June 2019

Homemade baked beans with chorizo

Homemade baked beans with chorizo
  • 1/2 red onion, peeled and finely chopped
  • 1/4 tsp smoked paprika
  • 1/4 tsp Garam Masala
  • Large pinch of oregano
  • 1 tbsp olive oil
  • 2 X 400g tins berlotti beans
  • 400g tin of chopped tomatoes
  • 2 tbsp balsamic glaze
  • 2 tbsp finely chopped flat leaf parsley
  • 150g sliced chorizo
  • 100ml vegetable stock
  • Few grinds of black pepper

Heat the oil in a large pan, add the onions and sauté for 10 minutes.  Add the oregano and spices and cook for a couple of minutes, add the chorizo and cook for 5 minutes, (this will release the oils which will add to the flavour of the dish) stir in the beans. 

Add the tomatoes to the pan along with the  balsamic glaze, stock and a few grinds of black pepper, bring to the boil and then simmer for 30 minutes (or up to an hour if you have the time).  Just before serving stir through the chopped parsley.

Have to say we loved this dish, we recently made it for a family BBQ and it went down really well.  I used a spicy chorizo which brought a good touch of heat to the dish but you can use milder, it will still taste great.  Whilst I reference 150g of chorizo, basically put in as much or as little as you like.  The dish can be cooked for a shorter period of time but if you can allow an hour the flavours will really develop.  Another quick and easy recipe which is perfect for that BBQ with family and friends

Homemade baked beans with chorizo


Saturday 15 June 2019

Pastrami & Poached Egg Pide

Pastrami & Poached Egg Pide
  • 8 slices of pastrami (cut into bite size pieces)
  • Large handful of grated cheddar cheese
  • 2 poached eggs
  • 4 cornichons, sliced thinly lengthways
  • Small handful of rocket leaves
  • Turkish pepper flakes
  • Rapeseed vinaigrette 
  • White wine vinegar
  • Melted knob of butter
  • Portion of pide dough (enough for two pide)


Make up a portion of pide dough as per my previous pide recipe and form into two boat shapes. 

Preheat the oven to 220 degrees.  Place your prepared dough onto a baking sheet, scatter the cheese over each pide then top with the chopped pastrami and cook in the oven for around 7 minutes.  In a pan of boiling water add a good couple of splashes of white wine vinegar and drop in two eggs and leave for 3 minutes then remove with a slotted spoon and set aside.

Once the pide are cooked, remove from the oven, top each with a poached egg, cornichon slices, rocket and a sprinkle of Turkish pepper flakes and lastly a drizzle of the vinaigrette then get stuck in.

This recipe will not disappoint, another one to add to my list of favourite dishes!  The toppings for these pide are endless, what would you fancy?

Monday 27 May 2019

Chicken Chow Mein

Chicken Chow Mein
  • 2 chicken breasts, cut into chunks
  • Half a red pepper thinly sliced
  • 4 tbsp dark soy sauce
  • 4 tbsp light soy sauce
  • 4 tbsp oyster sauce
  • 3 nests of medium egg noodles
  • 3 tbsp sesame oil
  • 1 tbsp cornflour
  • 2 cloves of garlic, thinly sliced
  • 1 bag of bean sprouts
  • 3 spring onions, cut into 2cm pieces
  • 1 tsp sugar
  • Few grinds of black pepper
Method:
Firstly, you need to marinade the chicken for at least an hour.  Place the chicken into a bowl, add 1 tbsp of dark soy sauce, light soy sauce and cornflour, mix well, ensuring the chicken gets a good coating then place in the fridge.

Cook the noodles according to pack instructions and then run under cold water to prevent them sticking together.

Heat the oil in a wok until hot, add the chicken and fry until cooked through, remove from the wok and set aside.  Add the garlic, sliced peppers and spring onions and cook for a couple of minutes, mixing as you go.  Add the noodles, chicken and bean sprouts, stir in the remaining dark soy sauce, light soy sauce, oyster sauce and the sugar and pepper, stir through and serve.

I recently made this dish with the young people at Dormans Youth Club where I teach, it was such a hit I decided to make it myself at home.  This seriously is a contender to rival any chow mein that you get from your local takeaway, you won't be disappointed.  Whilst chow mein is a noodle dish as opposed to a stir fry I did add some sliced peppers, which to be honest was just to add some colour to the dish!  I don't usually make dishes like this simply because I had never made anything that was on a par with food from the Chinese, but this changed my mind, try it yourself and let me know what you think.


Sunday 19 May 2019

Chicken and Artichoke Pide

Chicken & artichoke pide
This Turkish recipe is easier than you may think to make.  With the pide dough you make a boat shaped base which you can fill with a variety of fillings.  For this recipe I am using chicken and artichokes.

For the dough, you will need:-
  • 7g sachet of fast action yeast
  • 1 tsp caster sugar
  • 2 tsp salt
  • 2 tbs olive oil
  • 100 ml cold water
  • 300g 00 grade pasta flour

For the filling you will need:-
  • 2 cooked chicken breasts, shredded
  • Jar of artichoke hearts, drained
  • Handful of sliced black olives
  • 1 pepper thinly sliced
  • Turkish chilli flakes
  • 200g grated cheddar cheese
  • Small amount of melted butter
  • Rocket leaves

Put the yeast and sugar into a small bowl, add two tablespoons of warm water, stir and leave to one side.  Sift the flour into a large bowl and add the salt.  Make a well in the centre, pour in the olive oil and yeast mixture.  Combine the mixture with your hands, gradually pouring in the cold water.  Continue to mix until the dough sticks together, if needed add a couple more tablespoons of cold water.  Remove the dough from the bowl and knead on a floured surface for 5 or so minutes until the dough is stretchy.  Place the dough into an oiled bowl, cover with a tea towel and leave for 30 minutes until it has risen slightly.

Preheat your oven to 220 degrees.  Place in a pizza stone to heat or alternatively if you don't have a pizza stone, line a baking tray with baking paper.

Whilst there is enough dough to make 8 pide, this recipe will make 4, the remaining dough can be frozen or alternatively if making 8 increase the filling ingredients accordingly.

Cut the dough into 8 equal portions.  Using your hands, form 4 pieces into an oval shape.  Dust each side with flour and roll out into a long thin boat shape.  Prick the dough all over with a fork and place on the baking sheet or heated pizza stone.  Place you cheese, chicken, artichokes, pepper and olives onto each pide, leaving a small gap around the edge.  Fold the edges in on themselves and using a fork, crimp around the border.  Bake the pide boats for around 10 minutes until slightly golden.

Plate up, sprinkle over some Turkish chilli flakes and top with a small amount of rocket.  Brush the pastry with the melted butter and enjoy.  I drizzled over some rapeseed vinaigrette  and got stuck in!  

This is a light and tasty dish, you could have with a side salad for lunch or a light dinner.  We both really enjoyed this and can't wait to try something different with the remaining pide dough, watch this space!  What toppings would you try?


Saturday 11 May 2019

Sardines on toast

Sardines on toast
Another quick and easy recipe.  I was sent these sardines to review with my shopping from Ocado and after a quick ponder I decided on sardines on toast.  To make this tasty lunchtime dish you need the following:-

  • 2 tins of sardines (drained)
  • Handful of rocket leaves
  • Couple of slices of toasted bread
  • 4 eggs
  • Splash of white wine vinegar

Bring a large pan of water to the boil, add a good splash of white wine vinegar and then drop in the eggs.  There is no need to swirl the water around as the eggs should naturally bind together, I would however suggest cracking each egg into a small ramekin dish as this makes it quicker and easier to drop in to the water, as timing is of the essence. Cook the eggs for 3 minutes and remove with a slotted spoon and set aside.

Butter your toasted bread, add some rocket leaves, place on the sardines and then top each slice with a couple of poached eggs and get stuck in!  

For anyone who has never had sardines, they do contain bones but they are so small they are ok to eat.  The sardines I used were in a chilli and garlic oil which gave a subtle hint of flavour to the dish, they were also quite a decent size so you could slice them in half rather than use two tins.  


Sunday 5 May 2019

Quick and Easy Canapes

Egg & Bacon Vol au Vents

Egg & Bacon Vol au Vents, Caprese skewers, Tuna and Cucumber Wedges

Here are some really easy canapé ideas that can be put together in next to know time, they look great and they taste fab!  The amount of ingredients used will depend on how many canapes you are looking to make so you will need to adjust accordingly.

For the vol au vents I used 3 hard boiled eggs mashed together with a few tablespoons of mayonnaise, don't overdo the mayo, you don't want the mixture to be too loose, season with plenty of freshly ground black pepper.  I had two packs of ready made vol au vent cases (24 cases) which you then spoon or pipe the egg mixture into.  I grilled two rashers of bacon which I then cut into thin strips and placed a couple of slices into each vol au vent and then topped with some cress.  Not only do these look really good but they are so tasty.

Caprese skewers, Tuna and Cucumber Wedges

The caprese skewers are so easy, I used a bag of mini mozzarella pearls, there were 12 in the pack. Drain them from the liquid and pat dry.  You will also need 12 cherry tomatoes, 12 basil leaves and 12 cocktail sticks.  Place a folded basil leaf on top of the cherry tomato, top with the mozzarella pearl and skewer with the cocktail stick, it really is that quick!  I had a bottle of balsamic glaze which I also put out so people could drizzle over themselves but the skewers tasted amazing as they were, the flavours of each component just go so well together.

Lastly for the tuna and cucumber wedges I mixed together one drained can of tuna with half a finely chopped red onion, freshly ground black pepper and a few tablespoons of mayo.  Again, don't overdo the mayo, you don't want the mix to be sloppy it needs to hold together to sit on the cucumber.  I cut a cucumber into 12 thick slices and then topped each slip with a spoon of the tuna mix.  If you like a bit of heat you can add a few drops of tobacco to the mix just to spice it up a bit.

I made these recently for an afternoon tea and they went down really well, great flavours from all of them and again, so quick to put together, give them a try and let me know what you think.

Friday 26 April 2019

Indian style spicy chicken with rice noodles

Indian style spicy chicken with rice noodles


  • 4 chicken breasts


For the marinade

  • 1 tsp hot chilli powder (or 2 of mild)
  • 1/2 tsp salt
  • 1/2 tsp sugar
  • 1 tsp ginger paste
  • 1 tsp garlic paste
  • 2 tbsp vinegar


For the sauce

  • 2cm stick of cinnamon
  • 1/2 tsp black peppercorns
  • 1/2 tsp cumin seeds
  • 1/2 tsp fennel seeds
  • 1/2 tsp coriander seeds
  • 4 cloves
  • 1 tbsp vegetable oil
  • 2 garlic cloves, minced
  • 1 onion, finely chopped
  • 1 tbsp tomato purée
  • 3 tbsp water


For the noodles

  • 100g dried rice noodles
  • 2 tbsp vegetable oil
  • 1 tsp mustard seeds
  • 10 fresh curry leaves
  • 2 green chillies, cut lengthways 
  • 1/4 tsp ground turmeric
  • 1/2 red pepper, thinly sliced


Mix together the marinade ingredients and rub over the chicken breasts then set aside for 30 minutes.

For the sauce, mix together the spices and roast them in a dry frying pan until they begin to colour.  Using a pestle and mortar, grind the spices to a fine powder.  Heat the oil in the pan and fry the garlic until it starts to turn golden.  Add the onion and cook until softened, then add the spices, make sure you stir briskly to stop them from burning.  Add the tomato purée and cook for a further 2 minutes, stir in the water and set aside.

Preheat your oven to 180 degrees, place the chicken onto a baking try and cover each breast with the sauce, cook in the oven for around 20 minutes or until the chicken is cooked through.

Cook the rice noodles according to the packet instructions.  In a large pan heat the oil then add the curry leaves and mustard seeds.  Once they start to crackle add the chillies and turmeric, stir and cook for a couple of minutes.  Drain the rice noodles, add to the pan along with the sliced pepper, stir through for a couple of minutes and then serve with the chicken.

On the face of it you may think there are a lot of ingredients but most of these will probably be in your store cupboard, the fresh curry leaves are widely available in a number of leading supermarkets.
This is a spicy dish but you can always use a milder chilli powder if you prefer.  There should be plenty of sauce on the chicken to incorporate into the noodles so it isn't a dry dish.  Who needs to go out for an Indian or even get a takeaway when you can make this quick and easy dish in the comfort of your own home?  I hope you enjoy as much as we did.

Saturday 6 April 2019

Asparagus Spring Tart

Asparagus Spring Tart
  • 250g ricotta
  • 1 egg
  • 1 egg yolk
  • 1/2 tsp lemon zest
  • Juice of half a lemon
  • 1 tsp mustard
  • Handful of chopped parsley
  • Handful of grated Parmesan
  • Salt & Pepper
  • 8 asparagus spears
  • 4 slices of Parma ham
  • Handful of pea shoots
  • Vinaigrette 
  • 1 sheet of ready made puff pastry  

In a bowl, combine the ricotta, egg, parsley, lemon juice & zest, mustard, Parmesan and season with salt and pepper, mix well and set aside.

Line a baking tray with baking parchment.  Unroll the pastry and place onto the tray, you may need to trim the end as the pastry is just a bit bigger than a standard sized tray.  With a sharp knife, score the pastry 1" from the edge in a rectangular shape to create a scored border.   Using a fork, prick the pastry all over within the border (do not prick the border itself). Beat the egg yolk and with a pastry brush, coat the tart with the egg wash.  Preheat your oven to 180 degrees and place the pastry in and cook for around ten minutes, the pastry should have puffed up and have coloured slightly, and will have a raised border.  Remove from the oven and leave to settle for ten minutes then spread the cheese mixture over the pastry (not on the border).  Trim your asparagus spears to fit the tart and place them on top, tear up the Parma ham and scatter this on top and then cook in the oven for around 20-25 minutes, keep an eye though to ensure the pastry does not burn.

Once cooked, remove the tart from the oven, top with the pea shoots, some gratings of Parmesan and drizzle over a little vinaigrette.  I served this with a nice crisp salad but baby small potatoes tossed in butter would go equally as well.

This tart was so tasty, fresh and zesty from the lemon with a bit of punch from the mustard.  We are coming into asparagus season so this recipe is perfect right now however don't reserve it just for spring as you can get asparagus pretty much year round!  


Sunday 31 March 2019

Chilli Con Carne by The Spicery!

Chilli con carne by The Spicery!
Whilst I enjoy cooking from scratch, as you will know, I am not adverse to the odd cheat or two.  The Spicery are an online company who offer a vast array of different spice mixes, something to suit all tastebuds and styles of cooking.  Whilst you can make ad hoc purchases they also offer a subscription service and each month they will freshly grind and blend the spice mixes, measure them into individual portions and post the spicy goodness direct to your door in a letterbox sized box so no need to be home when it arrives!  The kit includes a colourful recipe which shows you how to make a feast using the spices for that month.  

I had come across The Spicery a couple of years ago whilst looking for some Christmas gift ideas and had purchased a subscription for my sister who thoroughly enjoyed them.  As is always the way, you make a purchase for someone else but then end up regretting not getting something for yourself!  I was therefore pleased to see them on special offer and included a couple with my recent Ocado shop.

Whilst I know how to make chilli con carne, not all recipes are the same so I'm always up for a new experience.  

This mix promised a spice blend for a smoky chilli con carne and boy did it live up to it.  Clear easy instructions to follow, OK, I did make a couple of alterations, I added a pepper which needed using up (I don't like to waste food!) and I also substituted the required water for beef stock which I like to think gave it an even greater depth of flavour.  The house was soon filled with a wonderful spicy aroma which most definitely was a smell of things of things to come!  

I do enjoy a dish with a good kick of heat, that said, whilst this dish did have some heat, it didn't need any more, the smoky flavour made up for it and this recipe was packed full of taste sensations which we both loved, needless to say once served, our plates were quickly cleared!   I served this with rice, homemade guacamole, sour cream and salsa with some corn chips.  The recipe does serve 4 so with the remaining portions I am going to serve them on jacket potatoes and I can't wait.


All in all a spicetastic experience and one I will be repeating, I can't wait to try the goulash spice mix I also got!  Right, I'm off to the website to check out what to order next, if you fancy giving them a go you can find them at www.thespicery.com


Saturday 23 March 2019

Spicy rice with chicken and prawns

Spicy rice with chicken and prawns
  • 200g basmati rice
  • 150g cooked edamame beans
  • 400ml vegetable stock
  • 2 tbsp curry paste  
  • 1 large carrot, grated
  • 1 red pepper, thinly sliced
  • 2 spring onions, cut into thin strips
  • 1 chicken breast
  • 3 eggs, beaten
  • Small pack of cooked prawns
  • Handful of chopped coriander
  • Knob of butter

Cook the chicken breast in the oven for around 20-30 minutes until cooked through.  Once cooled slightly, chop into small bite sized pieces.

Pour the vegetable stock into a saucepan, add the curry paste, I used red Thai curry paste but you can use your paste of preference, tip in the rice, stir through and bring to the boil, cover with a lid and leave to,simmer for around 10 minutes until almost tender and the liquid has been absorbed.

Melt the butter in a large frying pan, add the rice, carrot and beans, stir through and cook for a few minutes.  Add the beaten eggs and allow the egg to colour, add the chicken, prawns and half of the peppers and spring onions, stir thoroughly, this will break up the egg, cook for a few more minutes to warm through the chicken and prawns, add a handful of chopped coriander, mix and serve.  Top the dish with the reserved peppers and Spring onions.

This is a great little dish and will feed 2-3 comfortably.  I think next time I will add some fresh chilli to the dish as I do prefer more of a kick but by using whichever curry paste you prefer you can cook to your own liking and heat preference!

Monday 18 March 2019

Ricotta and Parmesan stuffed pasta shells


Ricotta and Parmesan stuffed pasta shells
  • 250g pasta shells
  • 475 grams Ricotta cheese 
  • 30g grated Parmesan cheese plus a bit extra for topping the pasta
  • 1 egg
  • Salt & pepper to season
  • 2 tsp finely chopped parsley (keep some in reserve for garnish)
  • 2 tsp chopped basil
  • 1/2 teaspoon dried oregano
  • 150g grated mozzarella
  • 600g marinara sauce
Method:
Bring a large pan of salted water to the boil.  Depending on the cooking instructions for your pasta, cook the shells for around half the required time as we want the shells to still be firm when we stuff them otherwise they will end up breaking if too soft!  Drain the shells under cold water and leave to one side.

In a bowl add the ricotta, Parmesan, egg, seasoning, lemon zest and herbs, mix well until you have a nice loose texture.  Place the mix into a piping bag if you have one, if not place into a freezer/sandwich bag and snip off a corner and use that to pipe with.  Pipe some of the cheese mixture into each of the shells and set aside.


Spread the base of your oven dish with some of the marinara sauce and place the filled pasta shells on top.  Cover the shells with the remaining marinara sauce and sprinkle  over the mozzarella cheese and a good few grinds of Parmesan cheese, place in a preheated oven (180 degrees) for around 30 minutes, or until the cheese is bubbling and golden.  When serving, sprinkle with some of the reserved parsley and enjoy with a crisp fresh salad and some garlic bread.

Despite the pasta and cheese this dish is surprisingly light thanks to the filling in the shells.  The measurements for this recipe can vary depending on the size of the dish you use to cook the pasta in, a good way to check the pasta content is to place dried shells into your dish to see how many it takes to fill!  If you do end up with too many shells don't worry, you can still fill them with the cheese mixture and freeze them to use another day.  This recipe is also great to make ahead of time and simply place into the oven when required.


Saturday 2 March 2019

Chicken with fennel, leeks and asparagus

Chicken with fennel leeks and asparagus
  • 4 chicken breasts
  • 8 slices Parma ham
  • 110g sliced baby leeks
  • 2 fennel bulbs (separated into layers)
  • Handful of asparagus spears (woody ends removed)
  • Juice and zest of one lemon
  • 2tbsp flour
  • 1 litre of chicken stock
  • Handful of chopped parsley
  • Salt and pepper
  • Knob of butter
  • Tablespoon of vegetable oil

Method:
Wrap each chicken breast with 2 slices of Parma ham, place onto an oven tray and cook in a preheated oven at 180 degrees for around 30 minutes, until the chicken is cooked through.  

Whilst the chicken is cooking, heat the oil and butter in a shallow pan, add the leeks and fennel and leave to soften for around 10 minutes.  Grate in the lemon zest, add the flour, stir through and cook for a few minutes before pouring in the chicken stock.  Bring to the boil, season, add the asparagus and cook for 20 minutes or so on a reduced heat until the sauce is thickened.  Prior to serving, stir through the parsley and lemon juice.

The original version of this recipe used skin on chicken thighs but due to a substitution in my shop I adapted the recipe with chicken breasts which I wrapped in Parma ham to keep them moist.  I have to say this was a great recipe, you have the vegetables within the dish so no need for any extras (unless you want to), we served this with some baby new potatoes, tossed in butter, a hearty satisfying meal which serves 4.  A nice crisp white wine would go nicely with this meal!


Sunday 17 February 2019

Marks Mighty Goujons

Marks Mighty Goujons

  • 400g chicken fillets
  • 25g panko breadcrumbs
  • Vegetable oil
  • 3 tbsp Dijon mustard
  • 2 tsp hot smoked paprika
  • Handful of finely grated Parmesan cheese
  • Zest of one lemon
  • Salt and pepper

Method:
Mix the Dijon mustard, smoked paprika and a little salt and pepper in a bowl.  Place the breadcrumbs onto a plate and mix through the Parmesan cheese and lemon zest.  Press the fillets into the mustard mix and then into the crumbs, ensuring they get a good coating, place onto a plate and put in the fridge for at least 30 minutes.

Put enough vegetable oil into a shallow frying pan to cover the base by about half an inch, heat until nice and hot.  Cook the chicken fillets until they are nice and crispy, should take around 15 minutes or so, leave to drain on kitchen towel and then serve.  We had these with chips and dips but they go equally well with a nice crisp salad.  Yet again another quick and easy recipe idea, who said chicken had to be plain and boring!

Sunday 10 February 2019

Lasagne

Lasagne
  • 300g fresh lasagne
  • 75g finely grated Parmesan
  • 50g butter
  • 2 tbsp olive oil
  • 1 onion, finely chopped
  • 1 carrot, finely chopped
  • 1 stick of celery, finely chopped
  • 2 cloves of garlic, minced
  • 250g pancetta, finely chopped
  • 600g mincemeat
  • 300ml red wine
  • 4 tbsp tomato purée
  • 400ml beef stock
  • 150ml double cream
  • Sea salt and ground black pepper
  • 2 tsp Italian seasoning
Bechamel sauce
  • 600ml full fat milk
  • 60g butter
  • 60g plain flour
  • Freshly grated black pepper

Method:
First we need to make the ragu (that's the meat sauce).  Heat the oil and butter in a large deep saucepan over a medium heat, add the vegetables and fry until softened.  Add the pancetta and mincemeat and fry until browned off (making sure you break up the mince otherwise you end up with clumps!).  Add the wine and simmer until it is absorbed into the mixture, then add the Italian seasoning, salt, pepper, tomato purée and a little of the stock, stir well, cover and cook over a low heat for 1 1/2 hours, stirring in the remaining stock during this process.  Stir in the cream and cook uncovered for around 10 minutes or so until it is reduced, then set aside.

To make the bechamel sauce, heat the milk until it's just about to boil, then set aside.  Melt the butter in a saucepan and stir in the flour over a medium heat until you have a smooth golden roux.  Gradually add the hot milk, stirring all the time, until the sauce is smooth and thick, then stir in a few grinds of black pepper then set aside.

Preheat the oven to 170g (fan assisted).  In a large rectangular baking dish add about a third of the ragu, smooth it out until the base is covered, cover with sheets of lasagne, top with a third of the bechamel sauce and then repeat the layers twice more.  Sprinkle over the Parmesan and bake for around 40 minutes, until the cheese is bubbling and browned.  Serve hot on its own or with a nice green salad and garlic bread.  This recipe will feed 6 or with careful portioning you could get 8 servings.

I prefer to use fresh pasta but you can use dry sheets, however they can be a bit crunchy if not covered fully!  Whilst it may seem a long time to cook the mince you will be glad you did as you will end up with a thick glossy ragu which is packed with flavour.  

This dish is perfect for any time of year and is an all time classic, once mastered you won't need another ragu recipe!  If you like to batch cook you can portion up some of the ragu and add some tinned chopped tomatoes and you then have a perfect bolognese sauce.

Wednesday 23 January 2019

Ricotta Gnocchi with lemon & sage butter

Ricotta Gnocchi with lemon & sage butter

  • 300g ricotta
  • 40g finely grated Parmesan
  • 2 tbsp grated lemon zest
  • 190g plain flour
  • 2 eggs
  • 50g unsalted butter
  • 15 sage leaves
  • Couple pinches of salt

Place the ricotta, Parmesan, flour, eggs and 1 tbsp of lemon zest into a bowl, mix thoroughly to form a soft dough.  Place the dough onto a lightly flour dusted surface.  Cut the dough into 2 pieces and roll out each piece into a 40cm rope length and cut into thumb size pieces.  Place the pieces onto a lightly floured tray or plate until ready to cook.

Bring a large pan of salted water to the boil.  Whilst doing this melt your butter in a large frying pan and add the sage and remaining lemon zest, keep an eye on the heat as you don't want to burn the butter.  Add the gnocchi to the pan of water, it will only take around 5 minutes, however no need to time as you will know it's done when the gnocchi floats to the surface.

By the time your gnocchi has cooked the sage should now be crispy.  Drain the gnocchi and add to the frying pan, we basically want to fry it until we get a nice brown crispy edge to it.  Once done, bowl up, drizzle over the remaining butter from the pan and top with the sage leaves.  This recipe should serve four.

Whilst you can eat the gnocchi as is, I served it on a bed of rocket along with some fried chorizo and drizzled some oil from the cooked chorizo over the top of the gnocchi, I think this really adds to the overall dish.  The gnocchi was so easy to make, as this was my first attempt I had made mine a bit on the large size, hence I now suggest a thumb sized piece.  We both really enjoyed this, with the ricotta as opposed to using potato, it made for a lighter dish and I will certainly be making this again.

Tuesday 15 January 2019

Chicken enchiladas

Chicken Enchiladas

  • 2 chicken breasts (cut into bite sized pieces)
  • 4 flour tortillas
  • 1 tin of black beans (or kidney or pinto beans, drained and rinsed)
  • 1 red onion, thinly sliced
  • Handful of finely chopped coriander
  • Good few handfuls of grated cheese
  • 2 tbsp vegetable oil
  • 2 tbsp plain flour
  • 2 tbsp chilli powder
  • 1/2 tsp garlic pwder
  • 1/2 tsp salt
  • 1/4 tsp ground cumin
  • 1/4 tsp dried oregano
  • 450ml chicken stock


Method:
To make the sauce, heat the oil in a medium sized saucepan, add the flour and whisk through over the heat for around a minute.  Add the remaining seasonings (don't have your head to near the pan as you will get a hit of the chilli!!) and stir through until combined.  Gradually whisk in the stock, continue to whisk in order to remove any lumps.  Turn down the heat and simmer for 15 minutes until thickened.

Whilst the sauce is thickening, heat some oil in a frying pan and cook the chicken for 10-15 minutes until cooked through.  You can add a few grinds of black pepper to the chicken or even some taco/fajita seasoning, for an extra hit of flavour.

Once the chicken has cooked and the sauce is done, we are now ready to assemble our enchiladas.  Coat each tortilla with some of the enchilada sauce.  Put a line of beans down the middle of the tortilla, top with some of the red onion, chicken and cheese then roll until you have a fat cigar shape which you place into an oven proof dish along with the other enchiladas.  You want a dish that the enchiladas just fit into, that way you ensure they don't open up whilst being cooked.  Drizzle any remaining sauce over the top of the enchiladas, top with more cheese and cook in a preheated oven (180 degrees) for around 10-15 minutes or until the cheese is nice and gooey.  Garnish the enchiladas with some chopped coriander and serve.


We had the enchiladas with some cheesy nachos, topped with sour cream and salsa and of course some freshly made guacamole.  Don't be put off by the amount of chilli powder in this recipe, it does even out in the cooking process, trust me!  Also when adding some sour cream that will have a cooling effect.  However if you are a real heat fiend you can always add some chopped jalapenos to the chicken and bean mix to really spice it up.


Whilst I dare say it myself, these are some of the best enchiladas I've had, the sauce is so quick and easy to make and if you have any leftovers it can be stored in the fridge for a few days or if you have made up a batch, freeze whatever is left, but believe me, this sauce wont hang around for too long, especially once your friends and family get to try it!